Before you start optimization you can always tweak Image Optimizer settings, however you can configure global settings for image optimizer on Swift Performance Settings > Media > Images tab. These settings will be applied for automatic optimizations as well.
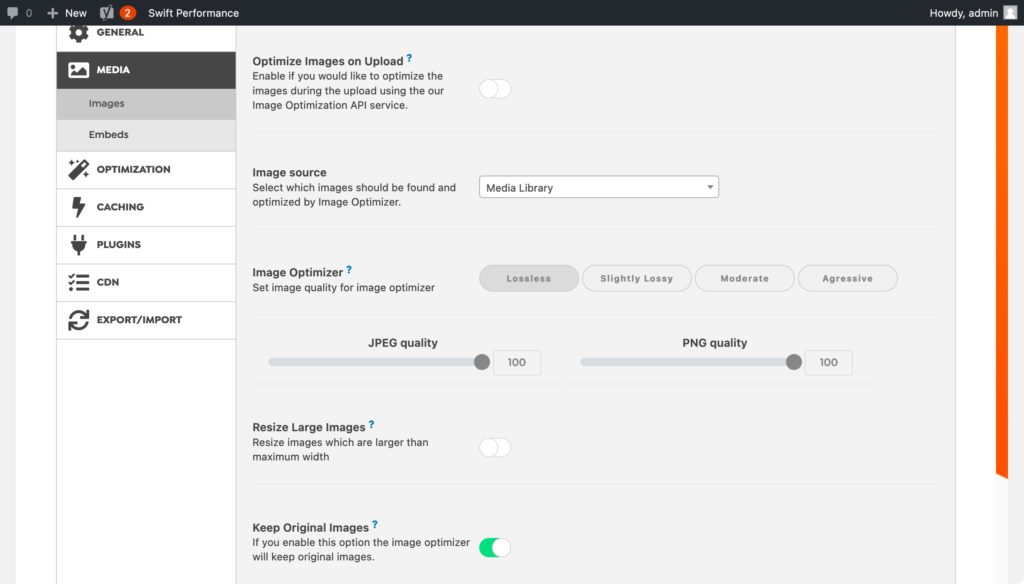
Optimize Images on Upload
You can enable this option, to let Swift Performance to optimize every images which has been uploaded.
Image source
Image Optimizer will create a new table in the database, where all data about images will be stored. You can set Media Library or WP Content directory as image source. If you set Media Library, then Swift Performance will load images only from the Media Library, other images, like plugin or theme icons, etc won’t be added. On multi site install Swift Performance will always use Media Library as source.
If you choose content directory as source, then Swift Performance will find all images in wp-content folder, even plugin and theme images.
Image Quality
You can use preset(lossless, slightly lossy, moderate or agressive), or fine tuning quality manually for jpeg and png images.
Resize Large Images
If you don’t need really big images, only web images you can resize uploaded images which are too large. You can specify maximum image width in pixels.
Keep Original Images
It is recommended to keep original images on first try. If you realized that optimized images quality is not good enough, you can restore original images with one click, and re-optimize them on higher quality.
If you would like to save some space, you can also delete easily original images if you are satisfied with the optimization quality.
Generate WebP
With Image Optimizer you can also generate WebP images